
Use Power Automate to onboard a new user in to Azure Active Directory. This is the joiners use case from the Joiners, Movers and Leavers (JML) set of processes and focuses on a possible solution for a small or medium business using Forms as trigger for the workflow. The Create a New User form captures some basic information about our new employee:
- Given Name – all the name data is used in the matching attributes in AAD and to form the display name.
- Surname
- Other Names
- Start Date – if the start date is in the future the account should be created in a disabled state.
- End Date – if this in the past then the account should be created in a disabled state.
- Department – the department the employee works in.

Like I said, this is a basic form and contains a small subset of identity data that would be held in a HR system.
Now we have a trigger lets create the workflow. From the Power Automate menu select My flows and then + Automated–from blank

Name the workflow and select When a new response is submitted from Microsoft forms and click create to enter the workflow creation screen.

The trigger of a New User form being submitted has been added and we’ll add a Get response details so that we can retrieve the data from the submitted form.

To create a new AAD user which is the goal of this workflow requires mandatory pieces of information:
- Account Enabled
- Display Name
- Mail Nickname
- Password
- User Principal Name
All of these require that the values from the form are manipulated in some fashion. To achieve this we are going to need a few variables.

I have attempted to organise these in some sort of order. Variables that have prerequisite flow in sequence, the first row contains all the attributes needed to create the user and the rest are used to create the password.

Next the Display Name is formed using Given Name, Surname and if present Other Names.

Next initial values are set of the values that need to be unique. So Mail Nickname is set to {Given Name}.{Surname} e.g Bob.Tester
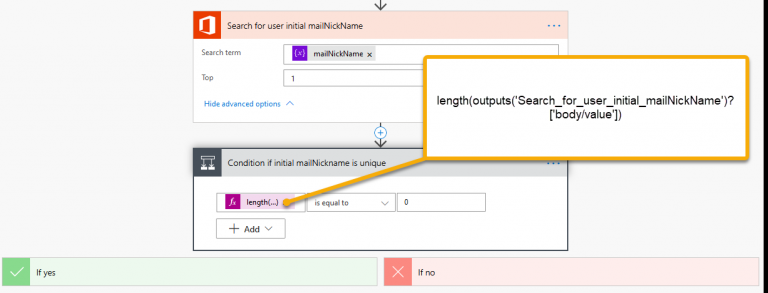
Now let’s search our O365 users with a the current mailNickName and test with an if condition to determine the number of matches returned. If 0 users are returned then yes side of the if does nothing as the value is unique. If 1 user is returned (it will never return more than 1 user as Top has been set to 1 in the Search for users (V2) operation) then some logic is needed to generate a new mailNickName and test it again until a unique value is found.
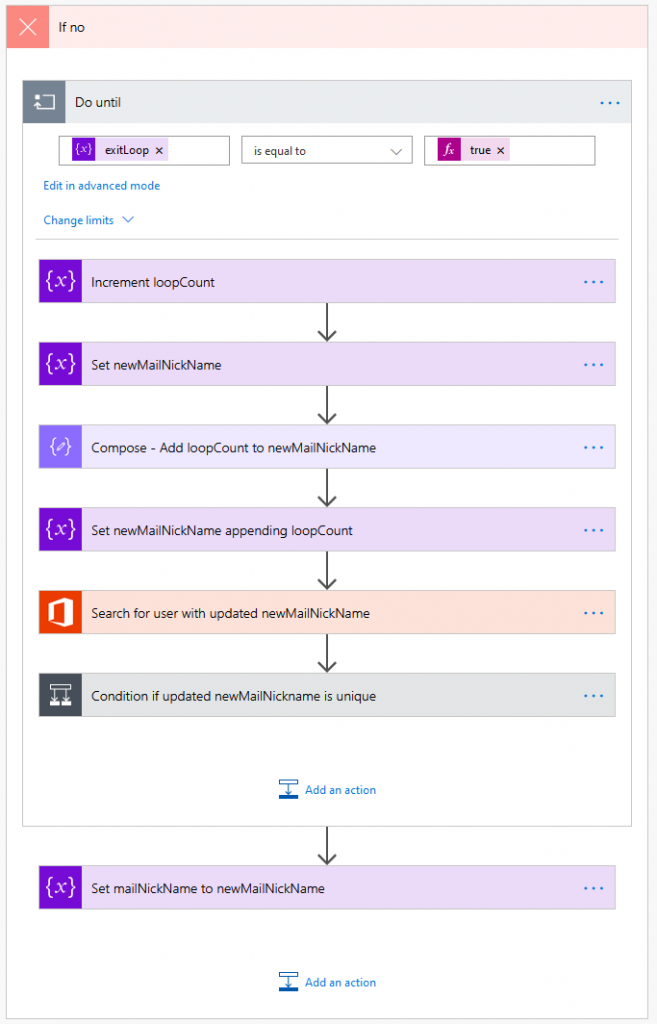
Here we loop until exit loop is true. New Mail Nickname is set to the current value of Mail Nickname and appended with .{loopCount} e.g Bob.Tester.1, this new value is search to ensure it is unique among our O365 users and repeats appending loop count to the end of the original Mail Nickname. Then this is now the Mail Nickname that will be used for our new user.
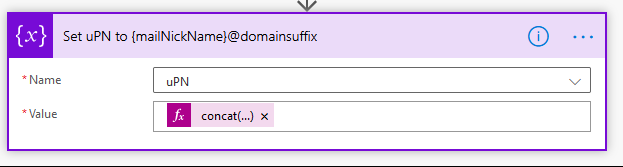
Now that a unique value has been determined for Mail Nickname this is used to form the UPN which is set to {Mail Nickname}@{Domain Suffix} Bob.Tester@test.org. Testing for uniqueness on the Mail Nickname isn’t great. Ideally both Mail Nickname and UPN should be tested.
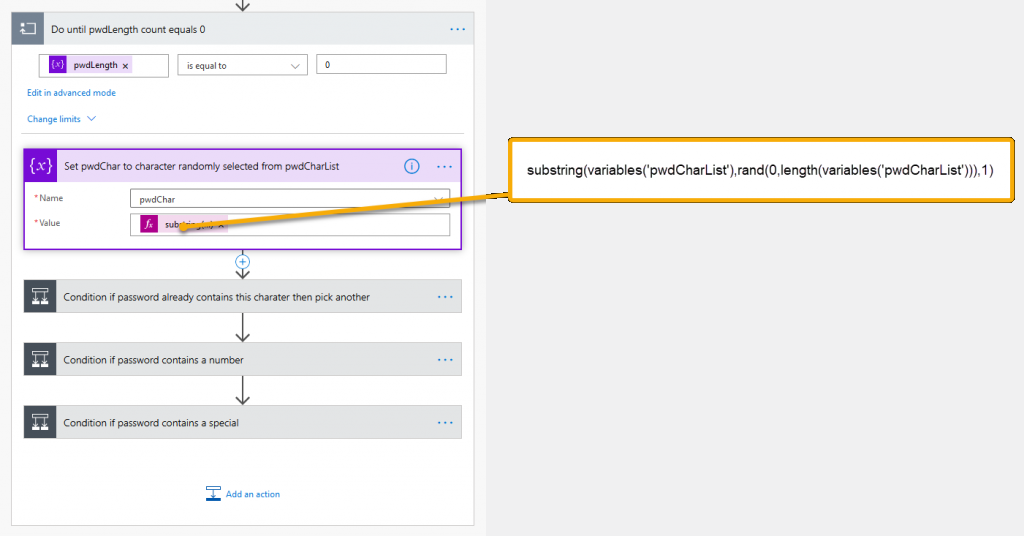
Another loop to create a password string. This is a achieved by randomly selecting a character or number from the string pwdCharList and building up the password string.

I have placed a condition to check that the same character or number is not repeated in the password string. Notice the use of the compose block to add the randomly selected character to password variable. It is not possible to self-refence a variable when setting its value. This gives an error ‘Self reference is not supported when updating the value of variable {variable name}.’
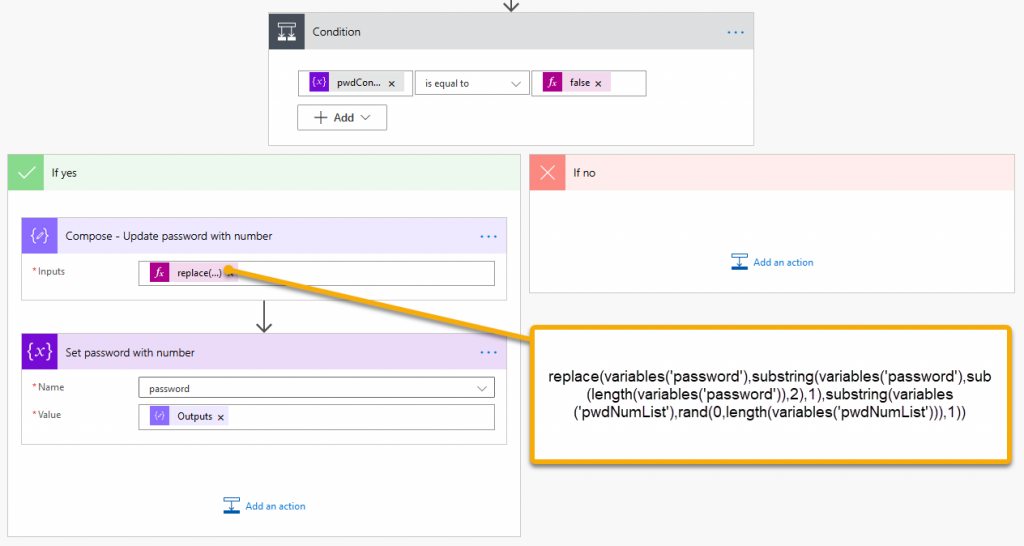
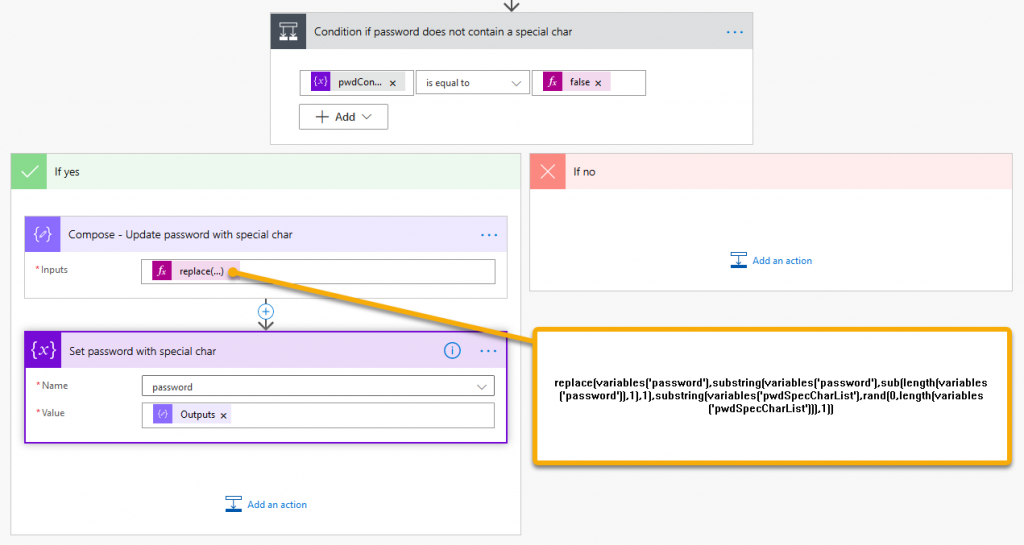
A couple more checks to see if password contains a number and special character if one or neither are present replace penultimate and/or the last character to make a complex password. This is far from a prefect password generation workflow but it will create a suitable candidate string nearly every execution.
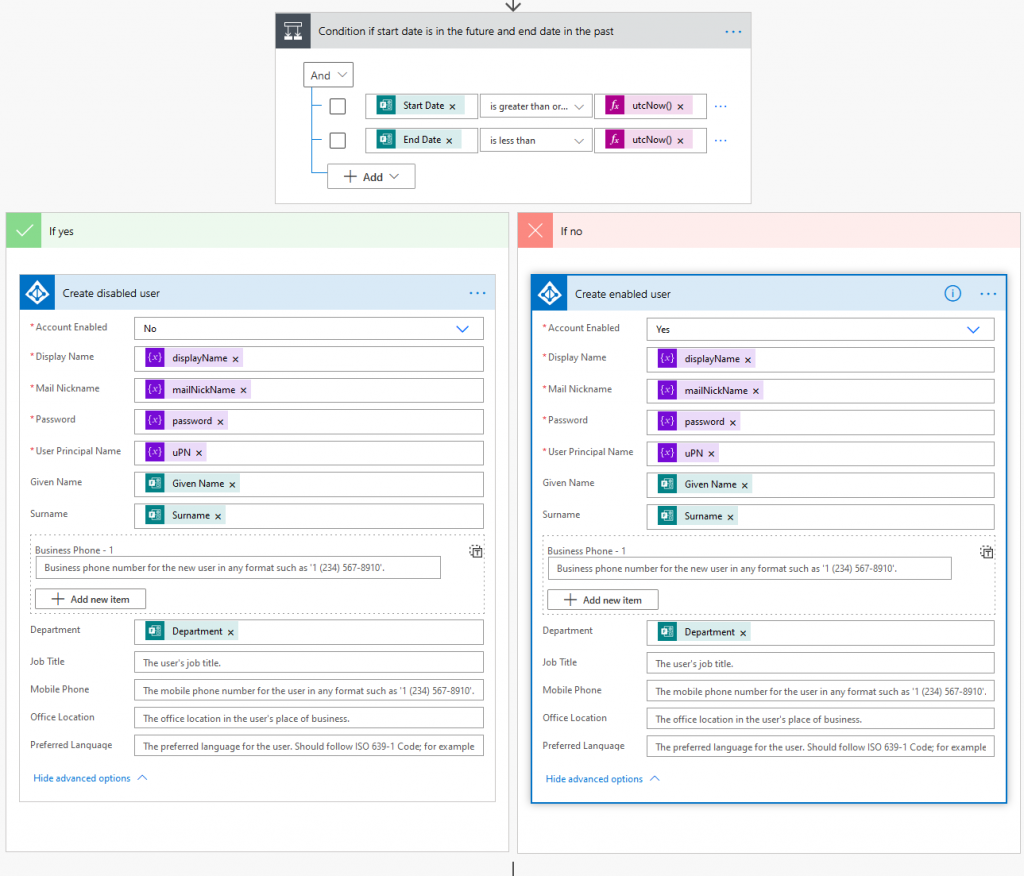
Now all the attributes needed to create a user have been prepared a condition based on start and end dates to see if the Azure AD user should be created enabled or not.
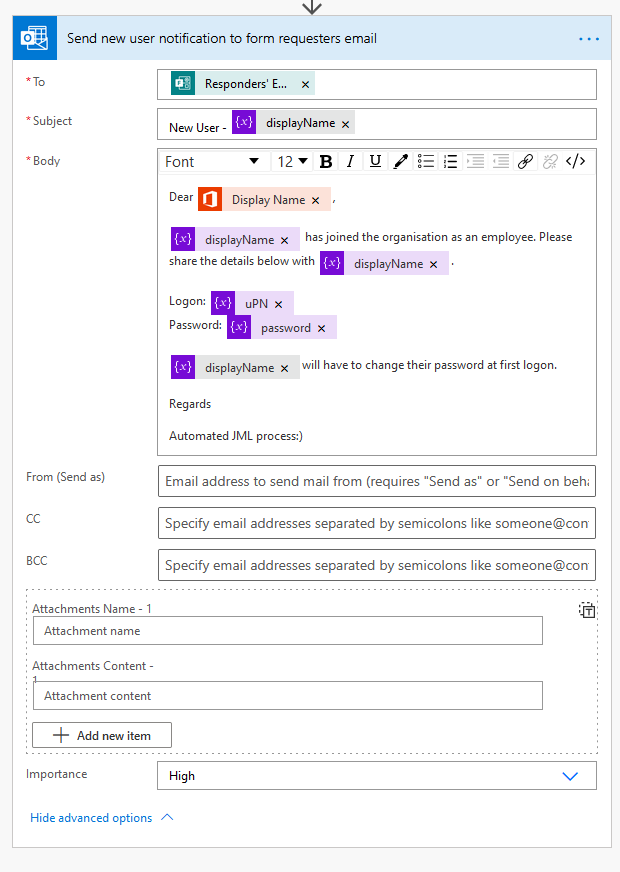
And the last step send an email to the requester giving the details of the new user.
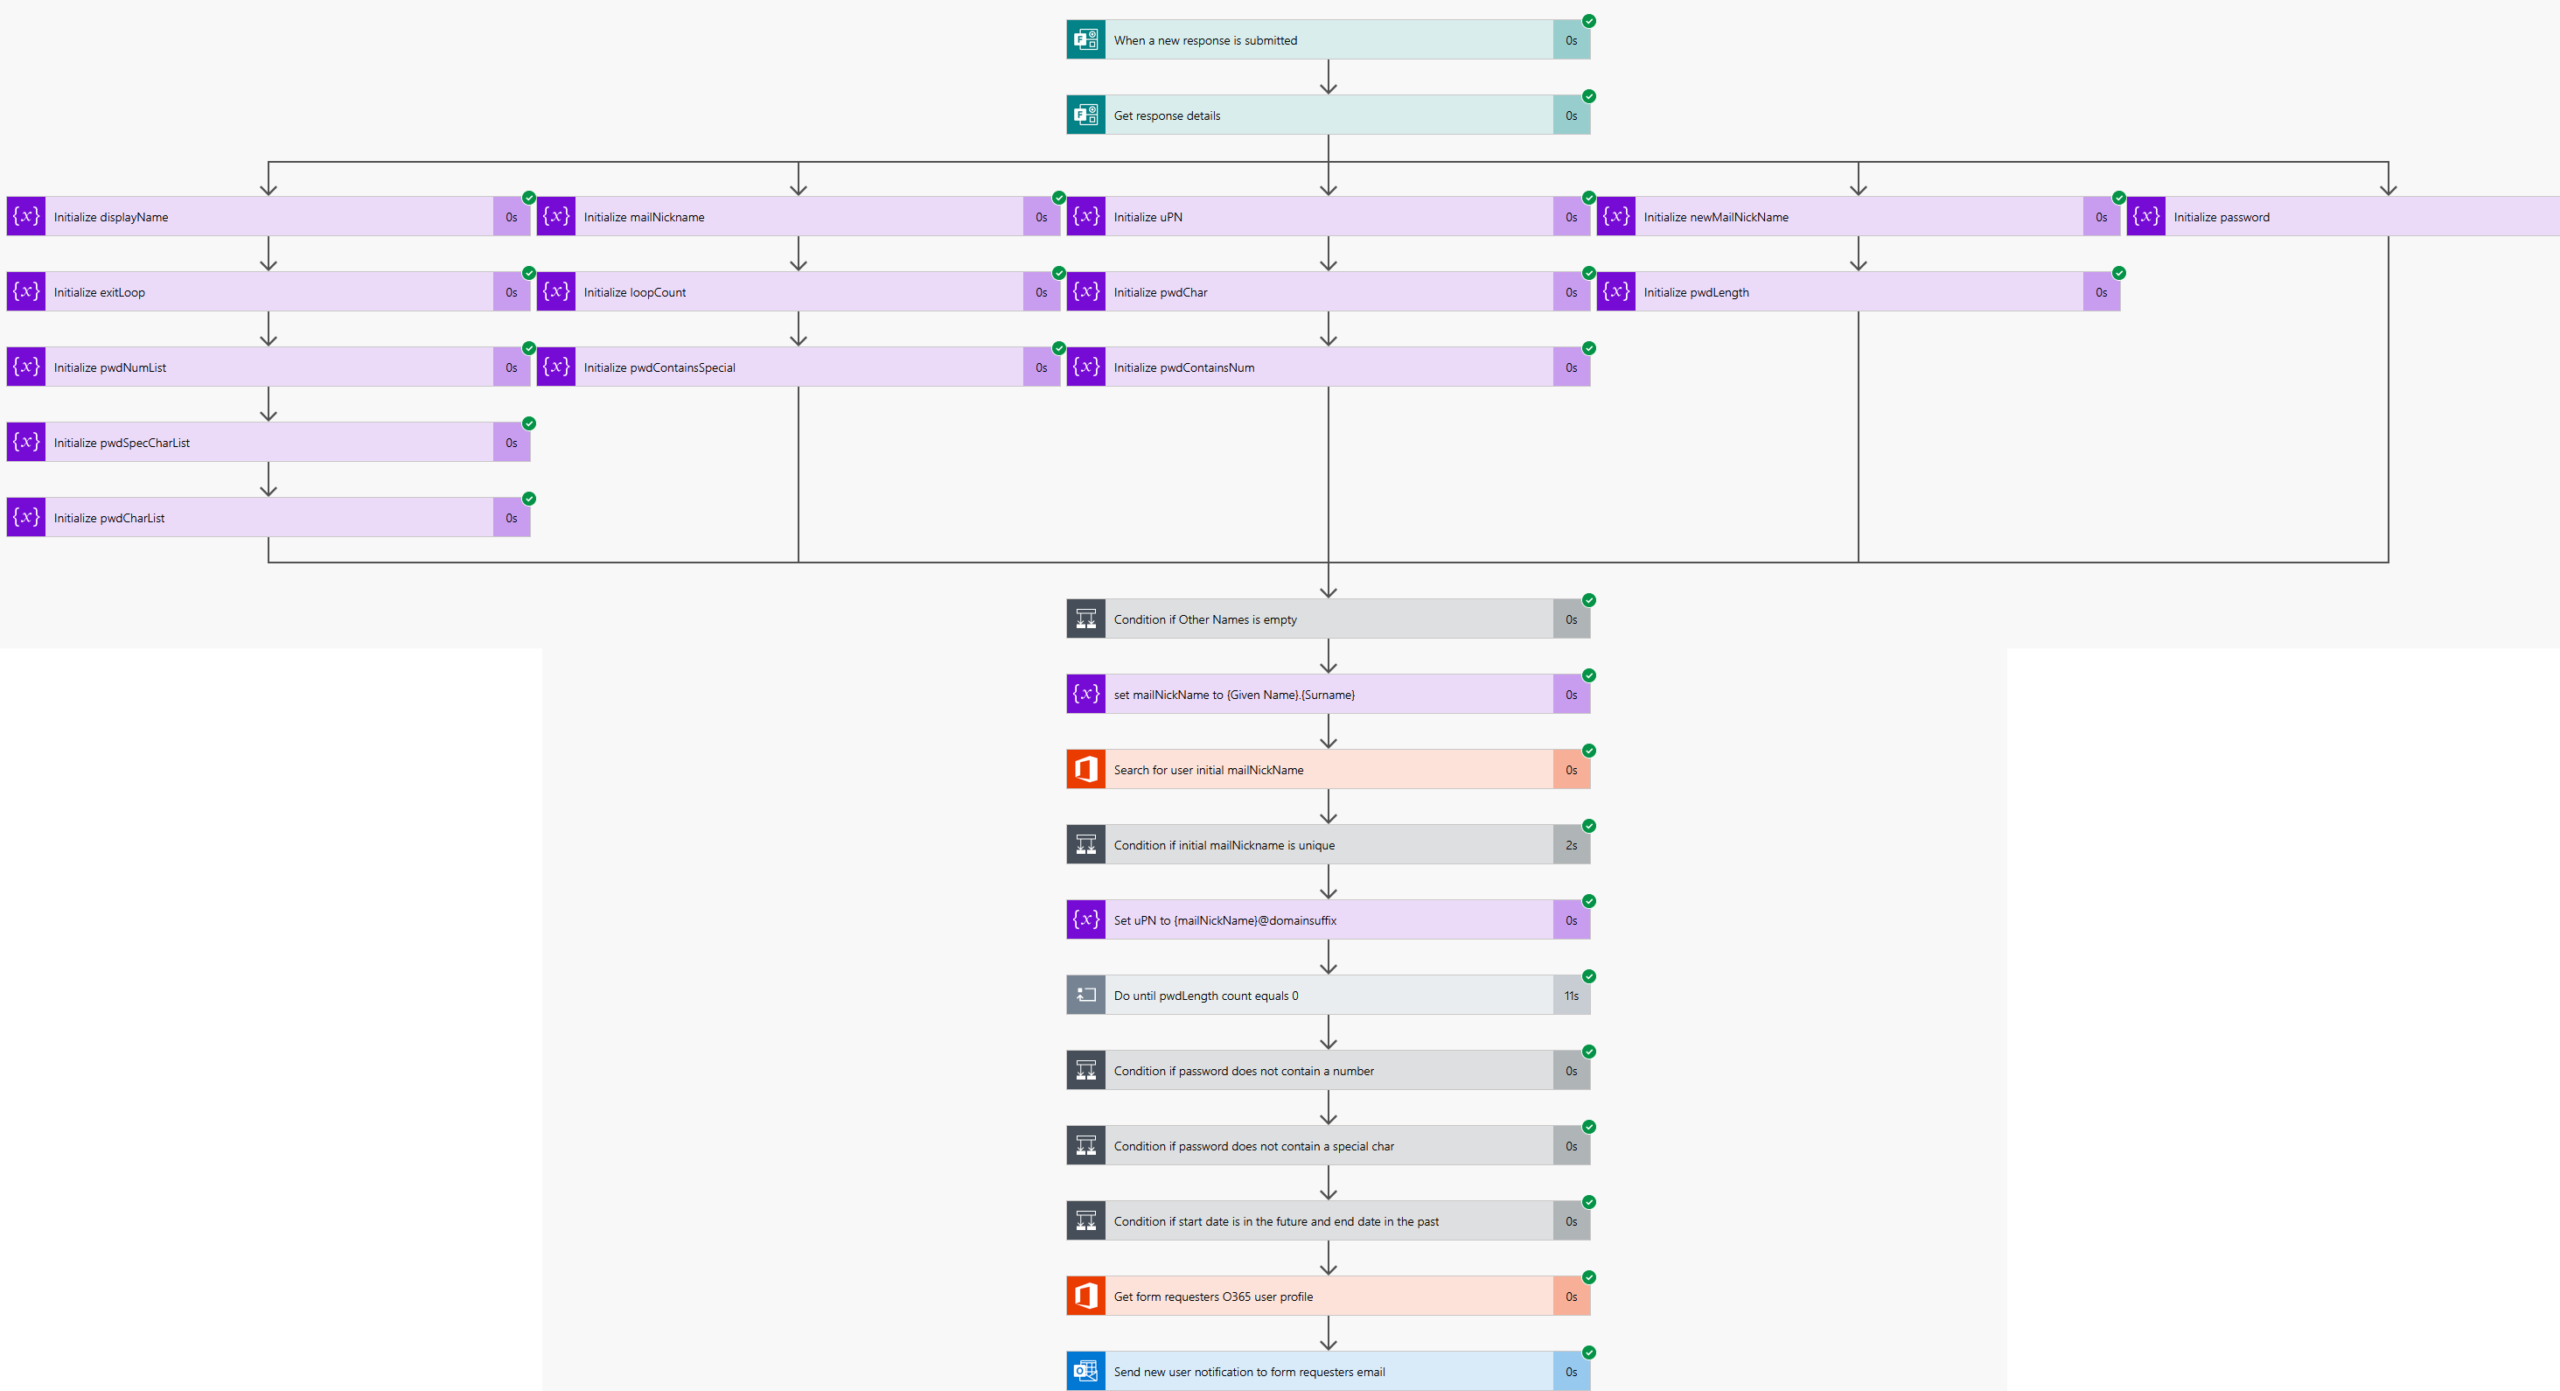
Running a test gives a screen of each step and whether each step and the overall workflow was successful or displays any error when not.
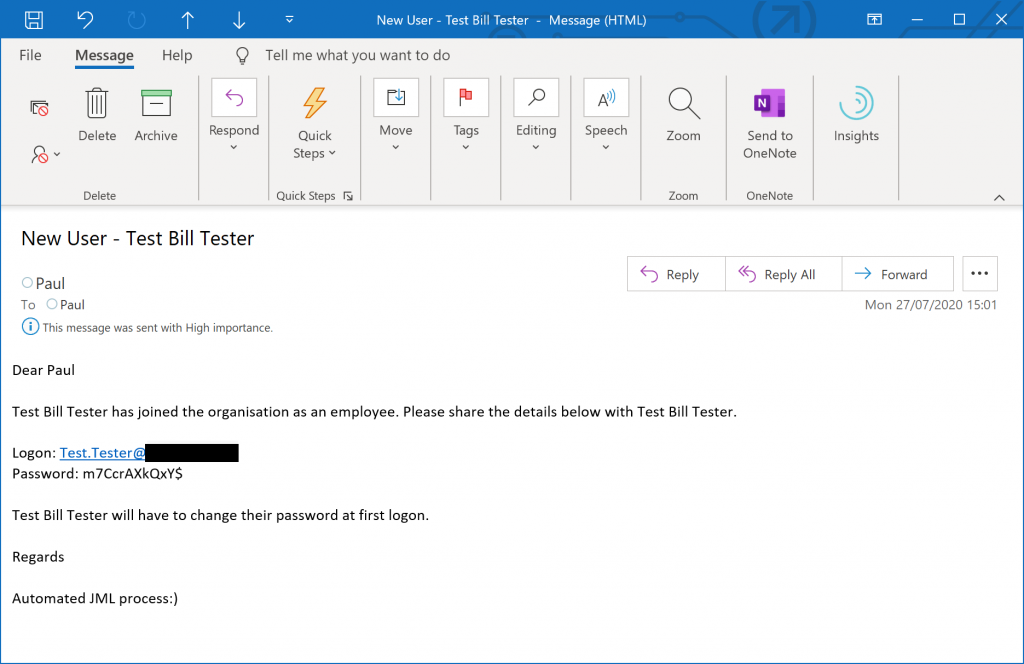
And finally the notification email.

Leave a comment